Well Chums the Story of the 2 Lancs Fusiliers Pilkem Battle starts on the 6th of July with the attack of the Rifle Brigade and the Somersetshire Light Infantry on the Hun lines to the east of the Yser Canal just to the North of Ypres. This map of 1914 Shows the area.
 |
| Yser Canal 1914 |
 |
| Hun Yser Trench Map July 6th 1915 |
Our front line on the morning of the 6th was the line next to the canal at the bottom of the map where the word Kanal is printed on it. You can also see this on yesterday's aerial photo.
Well chums the action started very early in the morning of the 6th with the shelling of the Hun front and reserve lines. This continued until about 6:30am when the Rifle Brigade and Somersets attacked the Hun front line. They were helped by a field gun that had been taken up right into the line. This had been rafted over the Yser and then manhandled to a position that was just 60 Yards from the Hun.
The attack was a resounding success. The field gun played its part by blowing in a sap head that would have seriously held up the attack. In fact the gunners charged forward with the Infantry and ended up being some of the first into the Hun front line!
The Hun front line was totally captured and held. However it was overlooked by the Hun further up at Pilkem and was heavily shelled by them. The Hun also mounted 3 counter attacks during the day to try and recapture the Trench. They were held off but the RBs and Somersets had heavy casualties. This is where we came in.
Knowing that the first troops would suffer heavily we were drafted to the 11th Brigade to support them. It was decided that we should relieve them on the evening of the 6th. We would also be complemented by two Companies and machine guns of the 1st Royal Warwickshire Regiment.
Our Commanding Officer, Colonel Griffin, the adjutant and four commanding officers moved up first to take over the trenches. They surveyed them from a cottage in Boesinghe and then moved down to the Battalion HQ in a dugout by the canal. We then moved up.
The scene was one of complete mayhem. As we crossed the Yser we we passed men of the RB and Somersets coming out. They were all shook up, bloodied and injured. There were men dragging themselves along and others carried on stretchers. The number of injured was too many to count. I felt sorry for the poor chaps but they were out of it, it was our turn to take the Hun on now.
As I crossed a pontoon bridge there were fatigue parties carrying stores across and to my astonishment a field gun was being manhandled across. I didn't know it at the time but this was the one used in the initial attack.
There were many parties carrying full barbed wire tressles for the front line, men in gas masks for fear of a gas attack, others carrying munitions. All were concentrated in a 200 yard stretch of the canal. If the Hun landed some shells in the area many a man would be killed. He was however quite reserved only firing the occasional shell that didnt land anywhere near, we were lucky!
When I reached the front trenches it as a scene of complete carnage. There were dead bodies lying all around. The parapets had been blown away and good many of the men also. There were bits of men all over, bodies with arms, legs and heads missing. There was also the odd arm or leg here or there. It was an abominable scene. One couldn't help but look, but if you did it made you more nervous of what could be. I put up my defences, get busy I told myself, don't give yourself time to think, dont look, just crack on.
We moved into the captured Hun trenches, my company, B Company, occupied the far left. This is the most northern part if you look at the map. Our commander was Captain Blencowe.
A Company occupied The far right under Captain Appleby, D company under Captain Smyth was in the centre and C Company under Captain Salt was in reserve in what was originally the British front line Trench. This was 50 yards behind the new front line.
The Warwickshire with some Hampshire's were in reserve on either side of the Yser Canal bank.
The change over and move into the new front line went quite smoothly and with little harrasment from the Hun. I surveyed our new Trench. It had some hastily prepared firing steps and the parapet had been crudely fashioned. Everything had previously faced the other way. There were sandbags quickly thrown up to secure areas. Most of the dugouts were smashed in and the Trench was very narrow.
My Battalion now occupied the whole of the new front line, it was some 450 yards long and I was in the northern part, the part closest to the Hun!
These sketched maps made by the Rifle Brigade show the layout of the trenches before and after. It gives you an idea of the ground we were holding and how close the Hun was.
 |
| RB Sketch of Pilkem Trenches July 6th 1915 |
This next Sketch shows the trenches in more detail and shows my Battalions positions. As I said early I was in the northern part nearest the Hun lines!
 |
| Pilkem Trenches held by 2LF 7th July 1915 |
So chums that was the prelude to one of my longest nights and days.
I'll post the next installment in two days time. The whole shooting match. See you then,
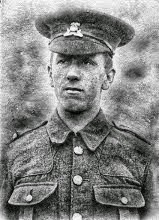
Albert x
0 comments:
Post a Comment